Printing from a Windows XP PC to a printer attached to an Airport Extreme Base Station or Airport Express
The following process is used in printing from an XP PC to a printer which is connected to the USB port of the Airport Extreme Base Station (AEBS) or Airport Express (AX).
Start -> Printers and Faxes
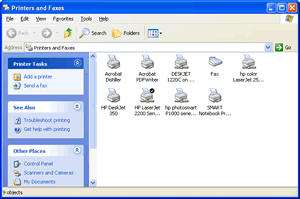
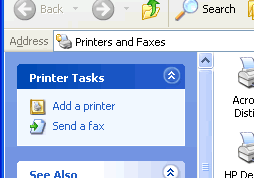
Click Add Printer
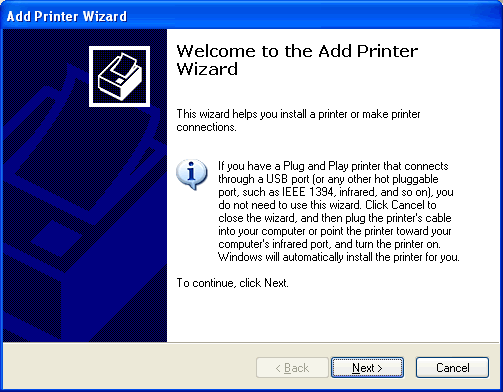
When the "Add Printer Wizard" comes up, click Next.
When prompted for Local or Network Printer, make sure the Local printer attached to this computer radio button is selected.
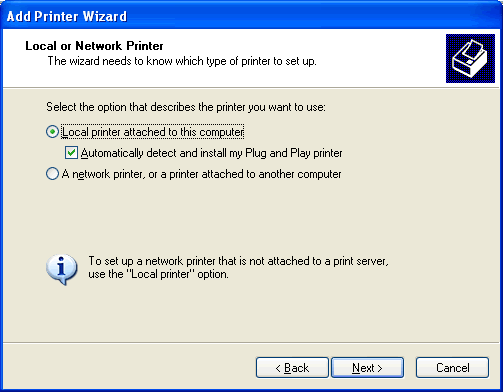
and that the Automatically detect and install my Plug and Play printer checkbox is OFF and then click Next.

Up will come the "Select the Printer Port" screen
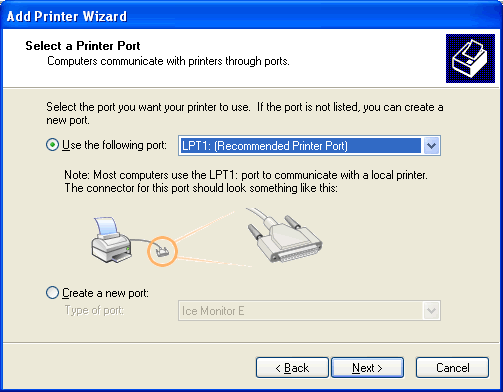
Click the Create a new port radio button, select Standard TCP/IP Port from the dropdown and click Next.
If you have already created the port in a previous attempt then use the drop down list to select the previously created port otherwise Windows won't let you create it a second time as it already exisits.

The "Add Standard TCP/IP Printer Port Wizard" will pop up.
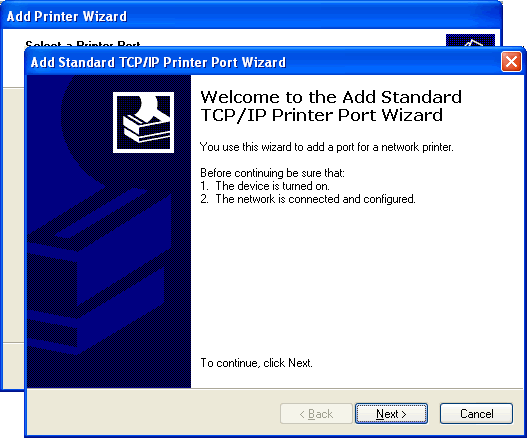
Click Next.
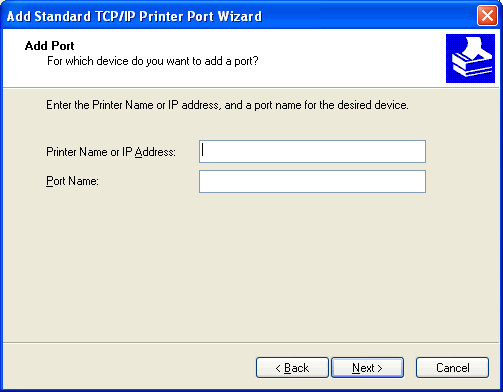
In Printer Name or IP Address if the IP address of the AEBS or Airport Express is 10.0.1.1, put "10.0.1.1" and let it generate "IP_10.0.1.1" as the port name.
The IP address you need to enter is the IP address of the AEBS or AX, use the Airport Admin Utility to confirm the IP address of the AEBS or AX, if you use the AEBS or AX as a wireless bridge, then it may have a different IP address such as 192.168.0.6 as in my example.

Click Next.
If Windows won't let you create the port then you may have already created the port in a previous attempt then use the drop down list in the "Select the Printer Port" screen to select the previously created port.
For Device Type in the next screen
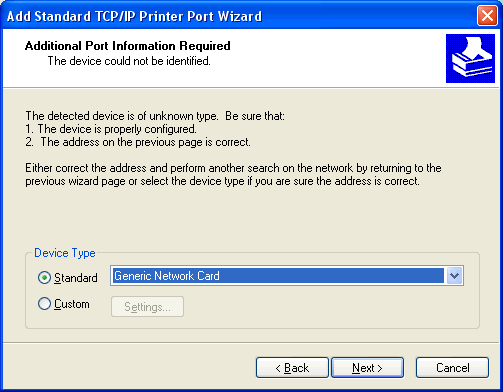
Click Custom
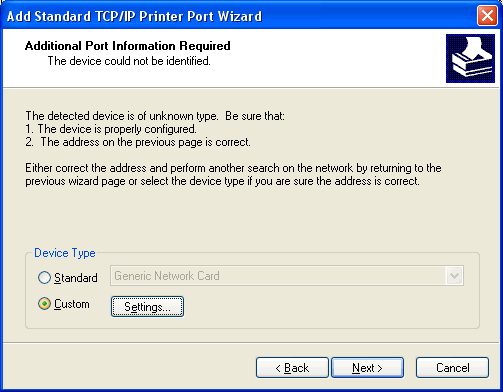
The click Settings and confirm that the settings are as below.
Note: you may need to use port 9101 in some cases, as some people have reported issues with using port 9100 and firmware 5.5.

Click OK
Then click Next

Click Finish and that wizard will close.
The Add Printer Wizard will now go to a new screen,for you to select the type of printer you have.
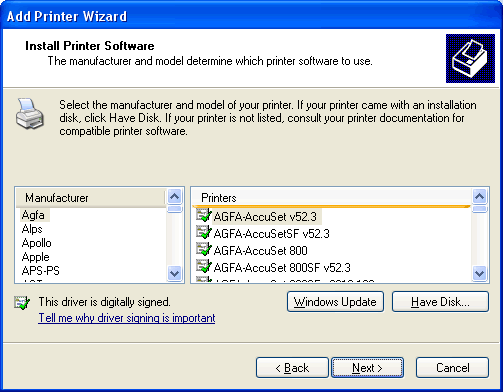
Select the printer type and model (or use the Have Disk... if applicable), in this example I am using a HP LaserJet 2200.
If you are having problems with finding the correct Printer Driver when using this method, please refer to Problems with finding Printer Driver when using printer connected to Airport Extreme or Express
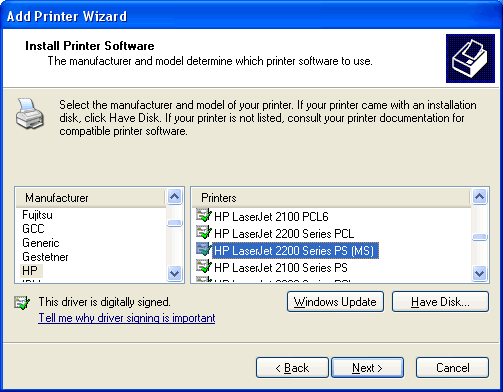
Click Next. You may need your Windows CDs handy if it asks for them.
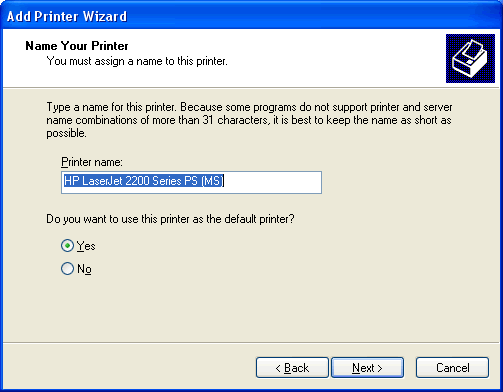
You may want to rename the printer for ease of identification.
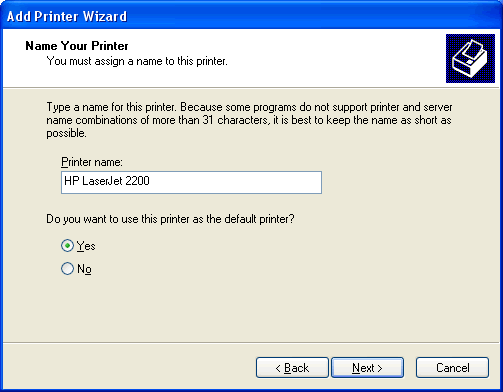
Decide if you want this printer to be the default printer for your XP PC. Click Next.
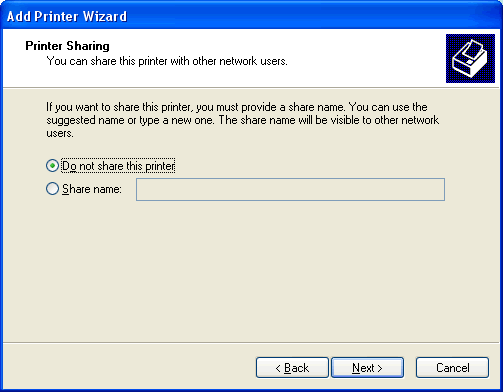
Click Next again because you don't want to share it through the Windows PC as it is already a shared printer.
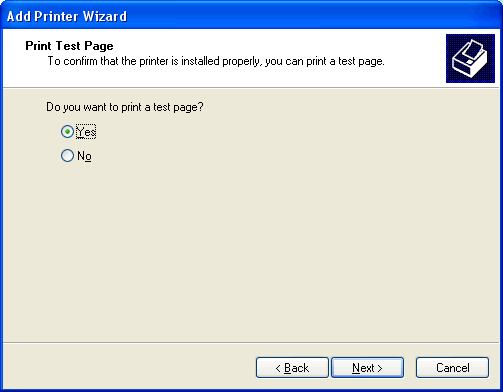
Click Next so that it prints a test page (you can skip this if you wish).
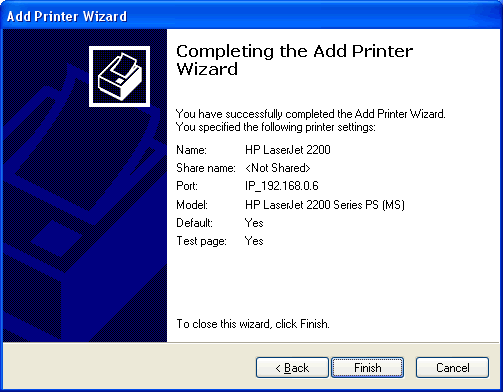
Click Finish and you should see the following screen.
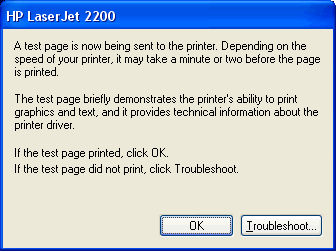
A test page will come out of the printer and you shouldn't need to troubleshoot.

